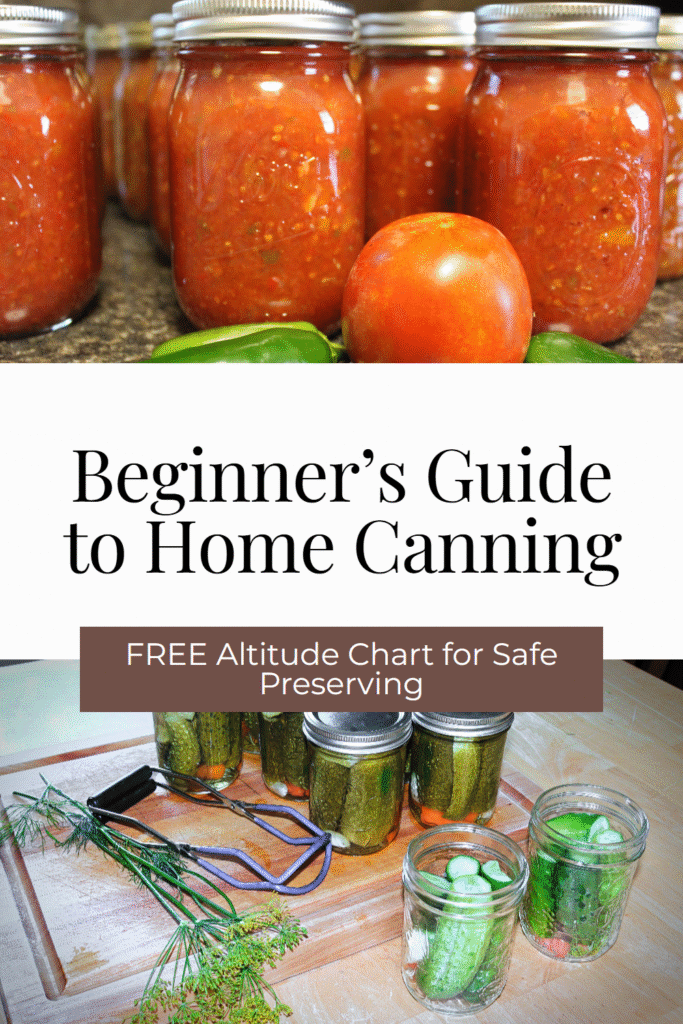
If you’ve ever stood in your kitchen after a big summer harvest, staring at baskets full of tomatoes, peppers, and cucumbers and thought, “What now?”, that’s exactly where canning steps in — inviting you to slow down and enjoy the simple, joyful art of preserving your homegrown goodness. I’ve been canning for a good while now, making memories along the way. It’s become one of those simple, comforting things I love to do. There’s something truly heartwarming about seeing rows of jars lined up on the pantry shelves—knowing each one came from your own hands (and garden).
This beginner’s guide to home canning is straight from my heart. I’ll walk you through the basics of home canning, the tools you need, how to tell the difference between water bath canning and pressure canning, and most importantly, how to do it safely. So grab your apron and let’s get started!
As an Amazon affiliate, I earn from qualifying purchases. This means that when you click on a link on this site and make a purchase, I may earn a small commission, which helps support the work of this blog. Rest assured, I only recommend products that I genuinely love and trust.
A Brief History of Canning
The canning process dates back to the early 1800s, when it was first developed as a food preservation method to keep soldiers’ rations fresh during war. Today, we have more reliable tools, tested canning recipes, and access to reliable sources like the National Center for Home Food Preservation, which make home canning safer and easier than ever before.
Why Canning is Such a Wonderful Way to Preserve Food
Canning isn’t just about saving fresh food. It’s about slowing down, stewarding your harvest, and creating something nourishing and homemade that your family can enjoy all year round. It’s also a great way to reduce food waste and grocery store spending.
I always say, when you open a jar of food you canned yourself, you’re tasting summer in the middle of winter. Whether it’s applesauce, ruby red tomatoes, or green beans from your own garden, the flavor (and joy!) is unbeatable.
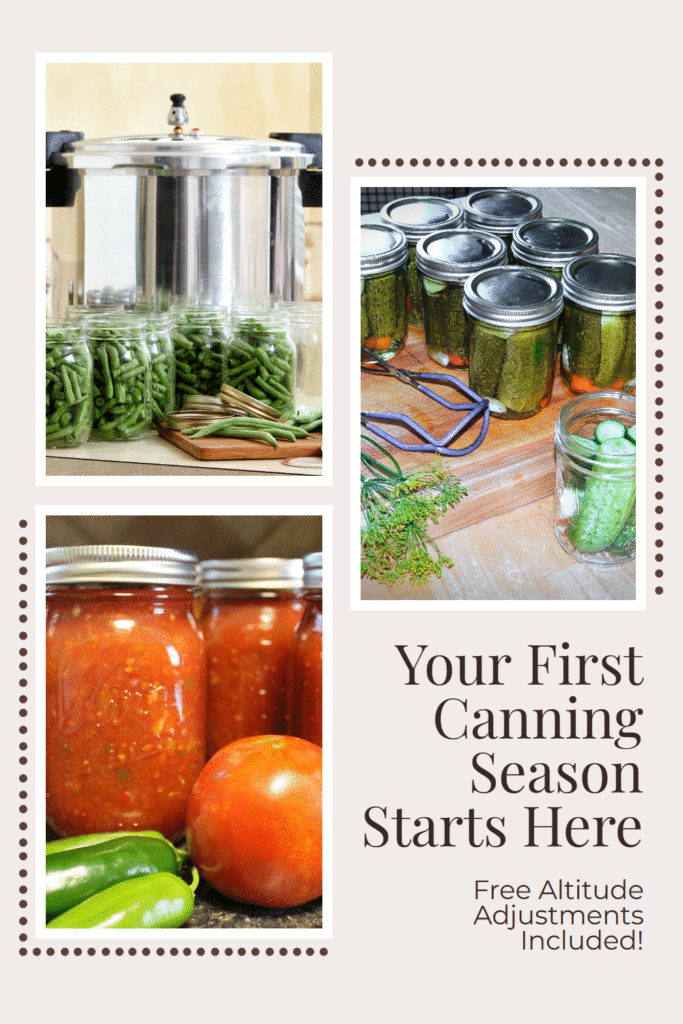
The Basics of Home Canning: Water Bath vs. Pressure Canning
There are two main canning methods: water bath canning and pressure canning. The method you will use depends on the acidity of the food you’re preserving.
1. Water Bath Canning
I started with this method and recommend it as the ideal starting point for anyone just beginning. This is what you will use for things like jams, jellies, pickles, salsa, and tomatoes (with added acid like lemon juice or citric acid). The water bath method is used for high-acid foods (pH 4.6 or lower) or recipes where you add enough acid to make them safe.
A water bath canner (also called a boiling water bath) is simply a large pot with a lid and a canning rack at the bottom to keep the jars from rattling against the pot. You bring the water to the boiling point of water (212°F at sea level), cover your filled jars, and process them for the specified amount of time.
High-acid foods (or those made acidic enough with lemon juice or citric acid) can safely be canned using this method because the high heat kills harmful microorganisms. Foods must have a pH of 4.6 or lower to be considered safe for water bath canning.
Foods that you will use water bath canning for:
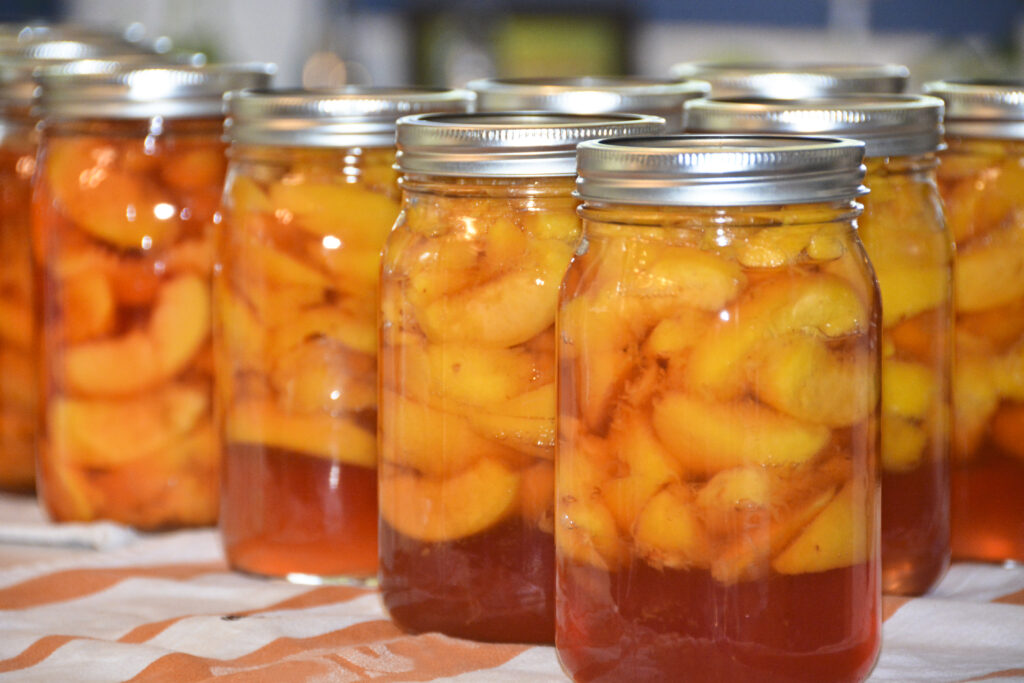
- Fruits (like peaches, apples, berries, pears)
- Fruit jams, jellies, and preserves
- Fruit butters (like apple butter)
- Pickles (cucumbers, pickled onions, pickled peppers)
- Salsas (acidified with enough lemon juice or vinegar)
- Tomatoes (plus added lemon juice or citric acid)
- Relishes
- Fruit sauces (like applesauce or cranberry sauce)
- Pie fillings (fruit-based)
- Vinegar-based hot sauces
2. Pressure Canning
If you’re canning low-acid foods (pH above 4.6) like green beans, corn, carrots, meats, broths, and wild game, you’ll need a pressure canner. Not a microwave oven or electric pressure cooker, but a true pressure canner made specifically for home food preservation.
Pressure canning uses high temperatures above 240°F to kill dangerous bacteria like Clostridium botulinum—the culprit behind botulism. This bacteria can’t be killed with just boiling water, which is why a pressure canner is necessary for low pH foods that have a pH above 4.6.
It might feel intimidating and scary at first, but trust me—once you understand the safety rules and follow an approved recipe, it becomes second nature.

Foods you will use pressure canning for:
- Low acid vegetables (green beans, corn, carrots, peas)
- Potatoes
- Meats (chicken, beef, pork, or game)
- Soups and stews (without dairy or thickeners)
- Beans & Legumes
- Broths and stocks (beef, chicken, and vegetable)
Canning Tools You’ll Want to Have Handy
You don’t need a ton of fancy gear to get started, but having a few essentials will make the whole experience easier and safer:
- Canning jars or mason jars (make sure they’re for canning, not just decorative glass jars)
- Flat lids and threaded rings
- A large pot or canning pot for water bath canning
- A pressure canner for low-acid foods
- A jar lifter to safely move hot jars
- A canning rack to keep jars off the bottom of the pot
- A funnel, ladle, and bubble remover tool (can use a wooden skewer!)
- A good book or reliable source on canning (Ball Complete Book of Home Preserving is a good one to have on hand)
- Plenty of clean jars in good condition
You can usually find these supplies at your local hardware store or online.
The Canning Process, Step-by-Step
Here’s a simple breakdown of what canning looks like—whether you’re using the water bath or pressure method:
1. Pick Your Produce and Recipe
Start with fresh food—ripe, not overripe—and always follow a tested canning recipe from a reliable source. Don’t try to freestyle the acid or timing; safety depends on getting that part right.
2. Prep Your Jars
Wash your canning jars in hot soapy water or dishwasher and make sure they are rinsed well. Keep them warm (I usually keep mine in hot water in the sink or dishwasher) until ready to use. A hot jar helps prevent breakage when adding hot-packed food.
3. Fill Jars Using Hot Pack or Raw Pack
- Hot packing means heating the food before placing it into jars (great for fruits and sauces).
- Raw packing means adding raw food and then pouring in hot liquid—common for firmer veggies like green beans or pickles.
Leave the right headspace at the top of the jar, as directed in your recipe. This helps with sealing.
4. Remove Air Bubbles
Slide a non-metallic tool (like a bubble remover or wooden skewer) down the sides of the jar to release air bubbles. This helps prevent sealing issues. Wipe the rims of the jars with a clean, damp cloth.
5. Apply Lids and Rings
Place the flat lid on top, then screw on the threaded ring until it’s just fingertip tight. You don’t want to overtighten—just enough to keep the lid in place during processing.
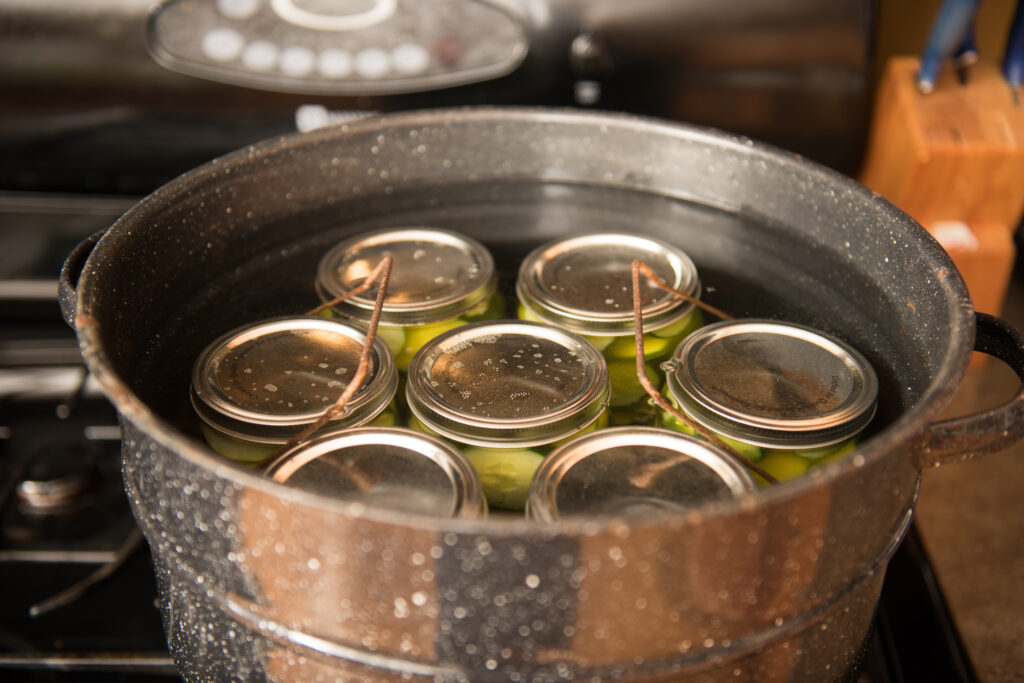
6. Process Your Jars
- In a water bath canner, make sure your water level covers the jars by at least 1 inch. Bring the water to a full boil, then start your timer based on the recommended processing time.
- In a pressure canner, place jars inside, lock the lid, vent the steam, and bring it up to pressure.
Tip
- Be sure to adjust for the altitude where you live.
- For higher altitudes, you will add additional minutes or increase your pressure time.
- This is a very important step and so easy to forget!
When I was first starting out, I made this mistake a few times and had to throw those jars out. You don’t want to do that! So, make a note or whatever you have to do to remember this step.
7. Cool and Check for Seal
Once processing is done, turn off the heat and let the jars sit briefly in the canner. Then use your jar lifter to remove them carefully and set them on a towel-lined counter at room temperature.
Let them cool for 12 to 24 hours without touching. Listen for that sweet “ping” sound as the airtight seal forms.
Press the center of the lid—if it doesn’t flex up and down, you’ve got a proper vacuum seal. If one doesn’t seal, just refrigerate it for immediate use.
Altitude Adjustments
Water Bath Canning:
Add extra time depending on your elevation:
| Altitude | Add to Water Bath Time |
| 0–1,000 ft | No change |
| 1,001–3,000 ft | +5 minutes |
| 3,001–6,000 ft | +10 minutes |
| 6,001 ft and up | +15 minutes |
Pressure Canning
Adjust pressure depending on your canner type:
Dial-Gauge Pressure Canner
| Altitude | Pressure (PSI) |
| 0–2,000 ft | 11 PSI |
| 2,001–4,000 ft | 12 PSI |
| 4,001–6,000 ft | 13 PSI |
| 6,001–8,000 ft | 14 PSI |
Weighted-Gauge Pressure Canner
| Altitude | Weight (PSI) |
| 0–1,000 ft | 10 PSI |
| Above 1,000 ft | 15 PSI |
Storing Your Canned Goods
Store your jars of food in a dark place, like a pantry or basement, where it’s cool and dry. A dry place helps prevent rust on the jar lids and rings. I always label mine with the contents and date so I can rotate through them for the best results.
Home-canned goods are safest and best quality if used within 1 year, but they can often last up to 18 months or more if properly stored.
Safe Shelf Life Guidelines:
- Best Quality: Within 12 months
- Still Safe: Up to 18–24 months, as long as:
- The seal is intact
- The food looks normal (no bulging lids, cloudiness, mold, or off smells)
- It’s been stored in a cool, dark place (50–70°F)
👎 Toss it if:
- The lid is unsealed or bulging
- There’s leaking, rust, or corrosion
- You see mold, bubbling, or off smells when opening
- The contents look strange or discolored
Even if it looks okay, never taste questionable canned food. My motto is When in doubt, throw it out!
A Few Words of Wisdom for the First Time Canner
Canning might feel a little overwhelming at first. I get it—I was nervous the first time I tried it, too! But it’s truly a great way to preserve your harvest and gain some confidence in the kitchen.
Here are a few helpful reminders:
- Always use tested canning recipes
- Don’t reuse flat lids
- Don’t forget to adjust for higher temperatures at altitude
- Stick to the general rule: high-acid = water bath, low-acid = pressure canning
- Add lemon juice or citric acid when canning tomatoes unless the recipe says otherwise
Canning might feel like something our grandmas did, but it couldn’t be more perfect for today—when so many of us are craving simple, homemade goodness and a break from all the processed stuff. There’s just something special about filling your pantry with jars you made yourself—it feels like home.
Final Thoughts From a Homemaker Who Just Loves Canning
Canning is more than just a hobby—it’s my way of making sure my family enjoys nutritious, wholesome food made right at home. From the moment I pick ripe tomatoes fresh from the garden to the satisfying “pop” of a sealed lid, it fills my heart knowing I’m caring for them in a simple, meaningful way. Whether you’re preserving hearty veggies or stirring up a quick batch of jam, the time you spend canning is always worth it.
And hey, if I can do it with kids running around and laundry on the line, so can you. Start small. Learn the basic methods. And don’t be afraid to mess up—every canner has a few flops along the way.
Whether you’re stocking your shelves for winter, cutting down on food bills, or just want to know what’s in your food, canning is a wonderful way to get there.
So pull out those mason jars, grab your canner, and give it a go. You might just fall in love with it like I did!
Shop the Post
As an Amazon affiliate, I earn from qualifying purchases. This means that when you click on a link on this site and make a purchase, I may earn a small commission, which helps support the work of this blog. Rest assured, I only recommend products that I genuinely love and trust.

Canning Supplies – Water Bath Canning Pot with Rack and Lid – Starter Kits Set for Beginners – Stainless Steel Water Bath Canner Kit and Rack – Canner Rack, XL Ladle, Measuring Cups, Kitchen Funnel
- The canning pot and rack in the market that comes with a food-grade stainless steel canning kit + ½ pint (8 oz) canning scoop + 6 measuring cups – steelcore core porcelain lightweight chemical free pot (Assembled in USA, 365 day back warranty, US & UK based 24/7 customer care).
- Lightweight canning pot – PFOA, PTFE and chemical free, made from dishwasher friendly Porcelain enamel surface with steel core pot (Not suitable for induction and glass cooktop hubs)
New starting from: 89.99
Go to Amazon

The altitude and pressure tables are so helpful! I will be referring to these soon when I start canning!
Thats great, I’m so glad you found them helpful!
Great info! This makes a great reference we can come back to 😊
Thank you!
This is a super helpful guide. I’m above 1000 feet for the first time in my canning life, and have to make myself remember to adjust for it. Your instructions are thorough and very easy to follow and I very much like the charts you provide. I’ll be saving this!
Thats great, thank you! I am also above 1000 feet and when I first started canning, I can’t even tell you how many times I forgot to adjust for it! Such a bummer and something you definitely do not what to do.
This is such a helpful guide! I’ve been wanting to start canning the food we grow but it’s always felt intimidating. I love how you break it down step by step and the information you share make me feel like I can do this! Thanks! I’m definitely saving this guide!
When you are just getting started it is definitely intimidating. But trust me, you can do it! Just give yourself some grace and go for it!
This post has great info! I’ve always wanted to can and never done it. I’ve watched soooo many videos on it but keep postponing… you’ve inspired me!
I’m so glad this was in inspiration to give it a try!
Its like you read my mind! You seem to know so much about this, like you wrote the book in it or something.
I think that you can do with a few pics to drive the message home a bit,
but other than that, this is excellent blog. An excellent read.
I’ll definitely be back.
Hello there, You’ve done a great job. I’ll
certainly digg it and personally suggest to my friends.
I’m sure they will be benefited from this website.